Climate Banner
Do you need an eye-catching banner summarizing climate science and XR’s theory of change? Look no further. Here, you’ll find instructions for printing and framing an XR climate banner.
Banners are translated into English, French, German, and Italian. If your language isn’t included, you can also download a .psd file and customize the banner yourself.

Budget:
- EU: €40 - €77
- USA: $60 - $102
Required Parts:
- Printed banners
- 4 wooden dowels or PVC tubes (dowels = cylindrical rods, 3 ft or 100 cm)
- Tape
Step 1: Printing
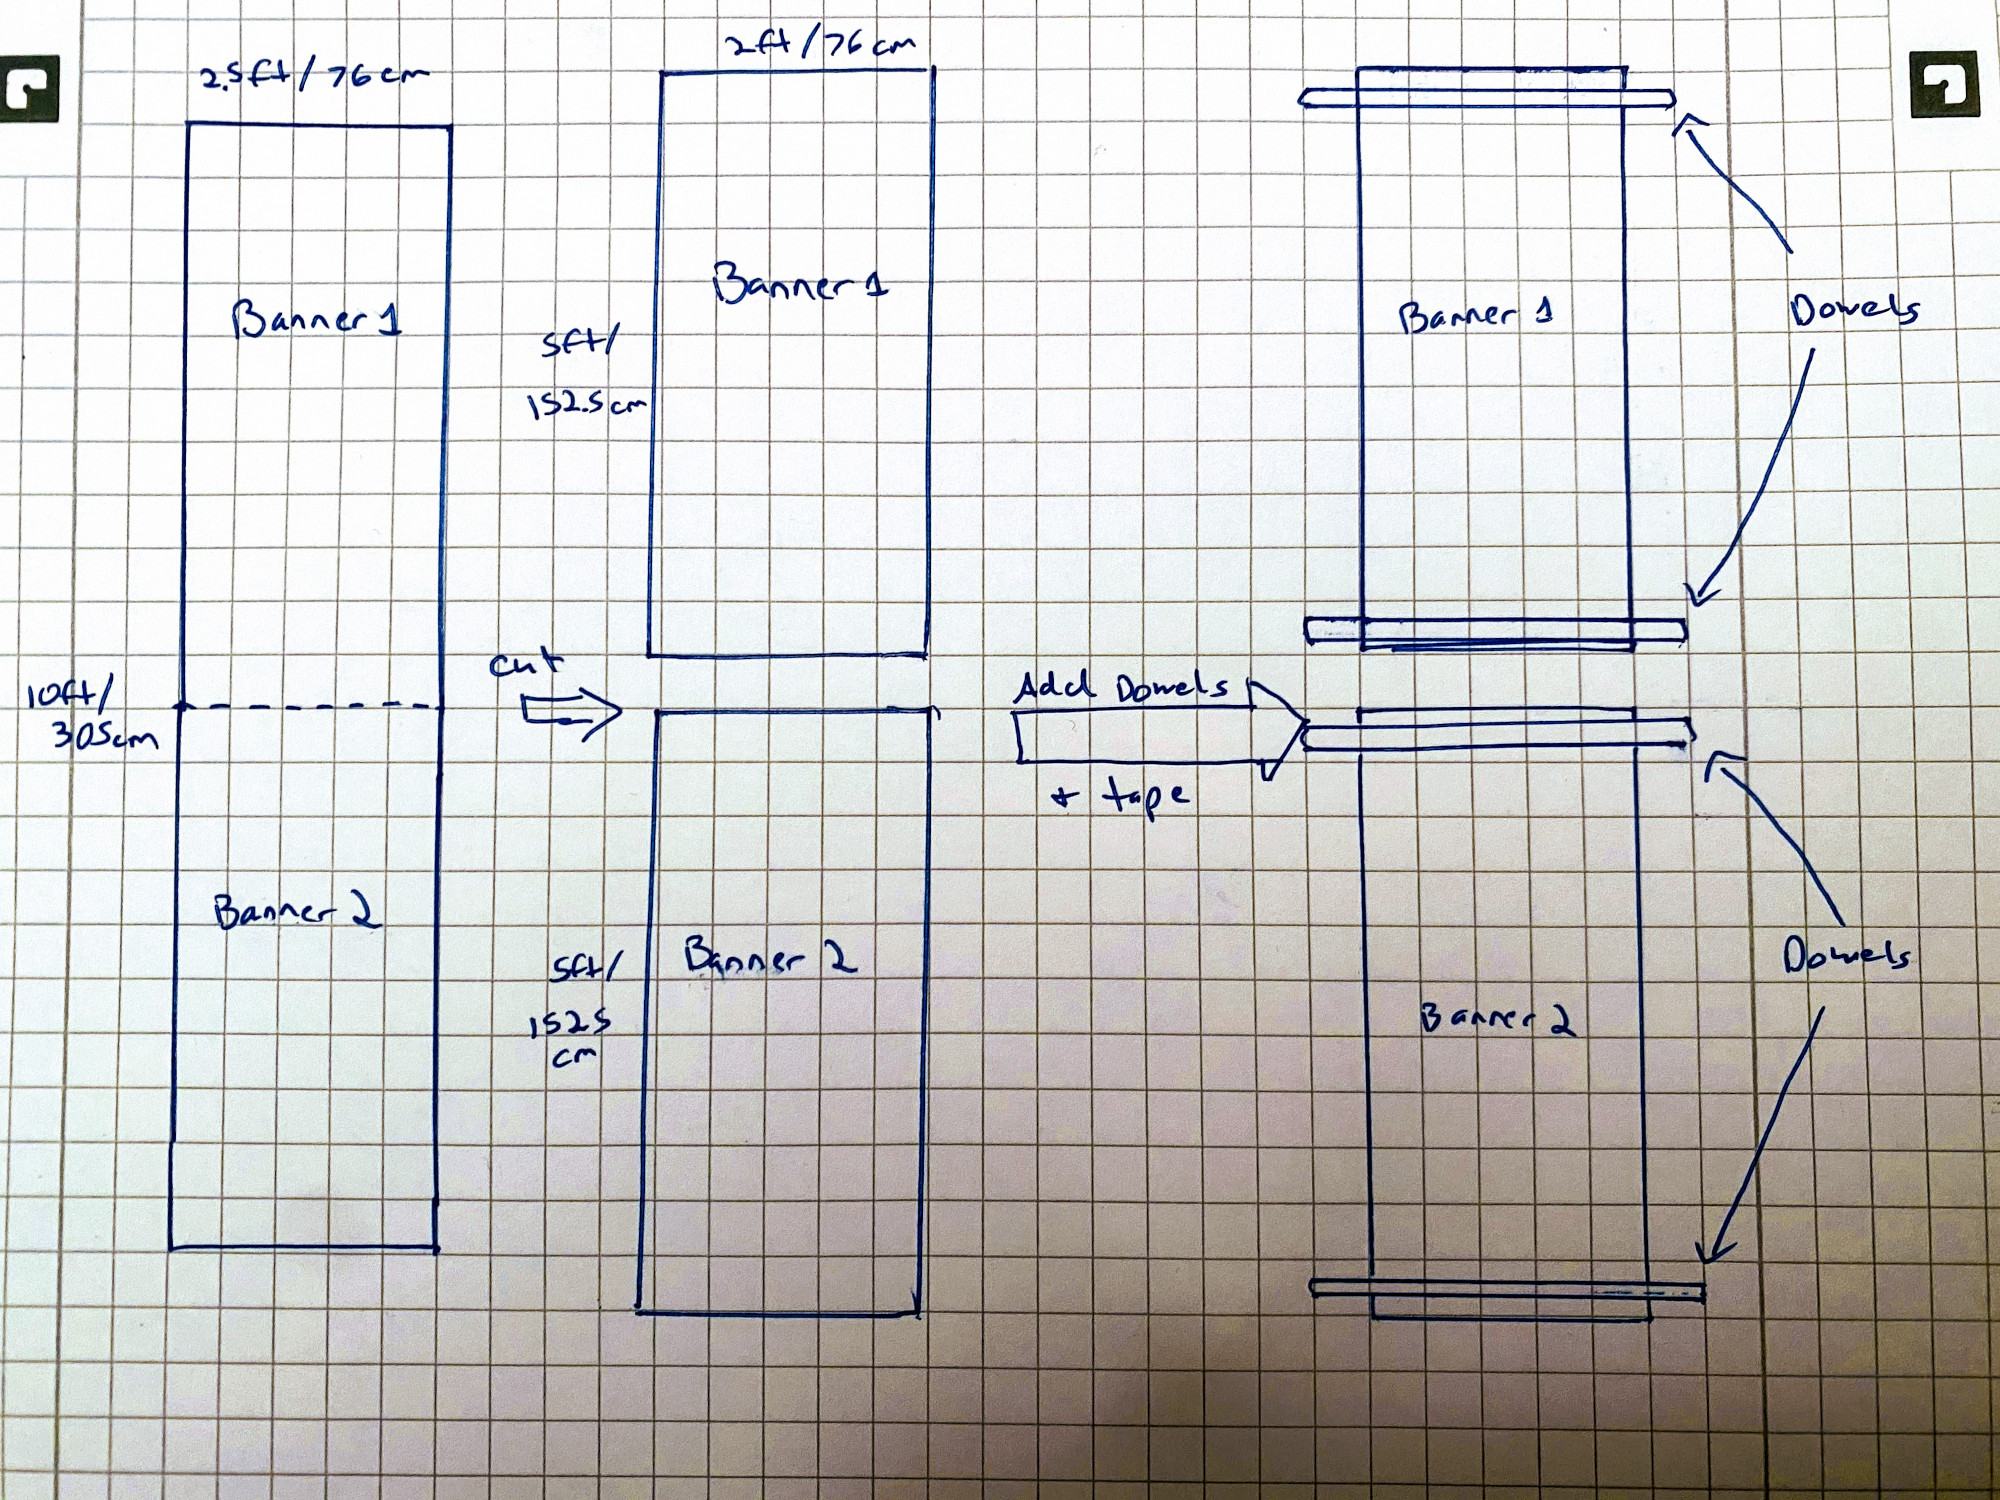
There are two banners. Each has a roughly 2:1 ratio. You can print these at a local print shop, or, if you have a large format printer or are happy to ‘tile’ the design (i.e. print it onto multiple pieces of paper and tape it all together) you can print at home. Make sure to leave enough blank space at the top and bottom for attaching the two rods that will make up its frame.
Printing at a shop costs about $102 for mesh banners from vistaprint or $60 for vinyl banners, both at 2.5 ft by 10 ft. In the EU, it’s €77 for a mesh banner from vistaprint, or €36 for a vinyl banner, both at 76cm x 305 cm. Both of these involve combining both images into a single very long banner and then splitting the images apart later on.
Step 2: Assembling
Once your print is ready, take two plastic or wooden cylindrical rods. (You could also use bamboo rods or suitable sticks). Position the first at the top of your print and wrap the print over and around the dowel. Leave a little extra of the material or paper below the dowel line. You can either tape this (for a paper print) or fix the dowel into position on a canvas print by sewing through the two layers underneath the dowel. Then repeat with the second dowel on the bottom of the print.
If you printed banners using the dimensions above, you’ll want dowels slightly larger than 76 cm or 2.5ft. You can find these for less than $5 or €5 at most hardware stores.
That’s it! Enjoy your new banner and spread the science.
Downloads
You can download the material here if you want to print or adapt the banner